
🧷 Key Takeaways
- For a quick full-screen capture press Ctrl + Show Windows – for partial screen capture press Ctrl + Shift + Show Windows for window capture press Ctrl + Alt + Show Windows.
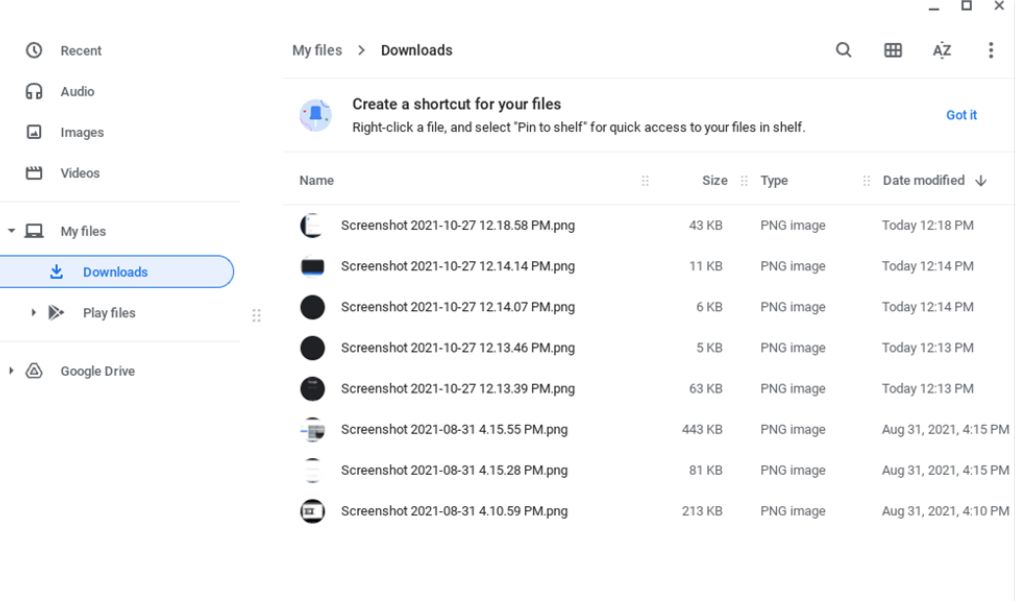
- To find screenshots: open Files App > Downloads Folder.
- Edit screenshots using a basic built-in editor or advanced third-party apps.
- Change notification preferences in Settings > Notifications > Screenshot.
- Chromebooks with and without dedicated screenshot keys are covered in this guide.
Taking screenshots on a Chromebook might interest you if you have just got one. Fortunately, it’s easy and quick to capture and edit screenshots on a Chromebook. And there’s no need to waste time fumbling with external screenshot tools unless you need them for advanced functionality.
For years, Chromebooks had a pretty basic screenshot tool and was only accessible through an obscure keyboard shortcut.
That changed later on when Google introduced a screenshot feature capable of capturing both photos and videos on Chromebooks. As Chromebooks are web-based laptops, you won’t find as many options for third-party screenshot tools compared to Windows and macOS.
Although Chrome extensions are plentiful, the quickest way to capture screen activity is by using ChromeOS’ native tools.
This guide discusses all Chromebook models, including those with and without dedicated screenshot keys.
You’ll Learn
- How to take screenshots on Chromebook, and edit them with built-in tools.
- Discover incredible third-party Chromebook Screenshot tools.
Let’s get started.
Take a quick screenshot on Chromebook (Using keyboard shortcuts)
Capture entire screen
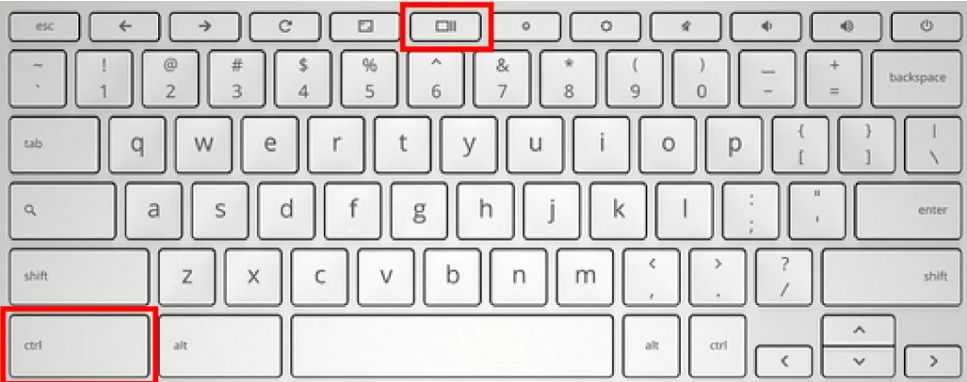
Press Ctrl + Show Windows key (the “Show Windows” key resembles a rectangle with two smaller rectangles stacked behind it) to capture your entire screen.
This will capture everything you see on your screen.
Upon capture, there will be a brief animation and the screenshot will be saved to your Downloads folder.
Capture a specific area
Follow the steps below if you want to capture just a portion of your Chromebook screen.
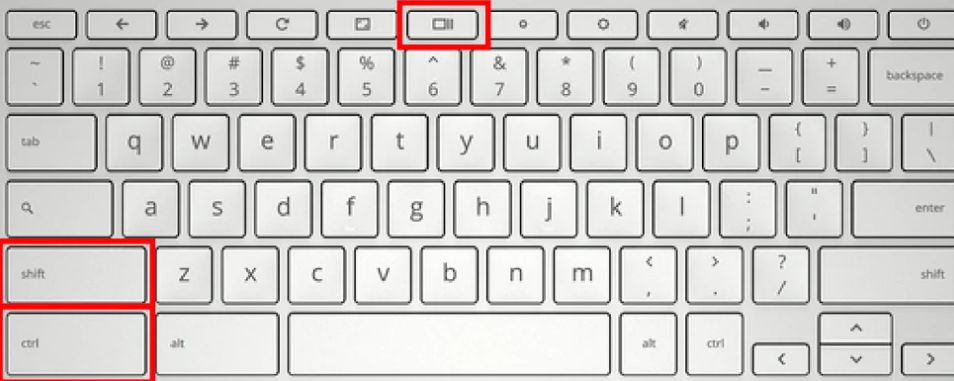
Press Shift + Ctrl + Show Windows Key to activate the Screen Capture tool.
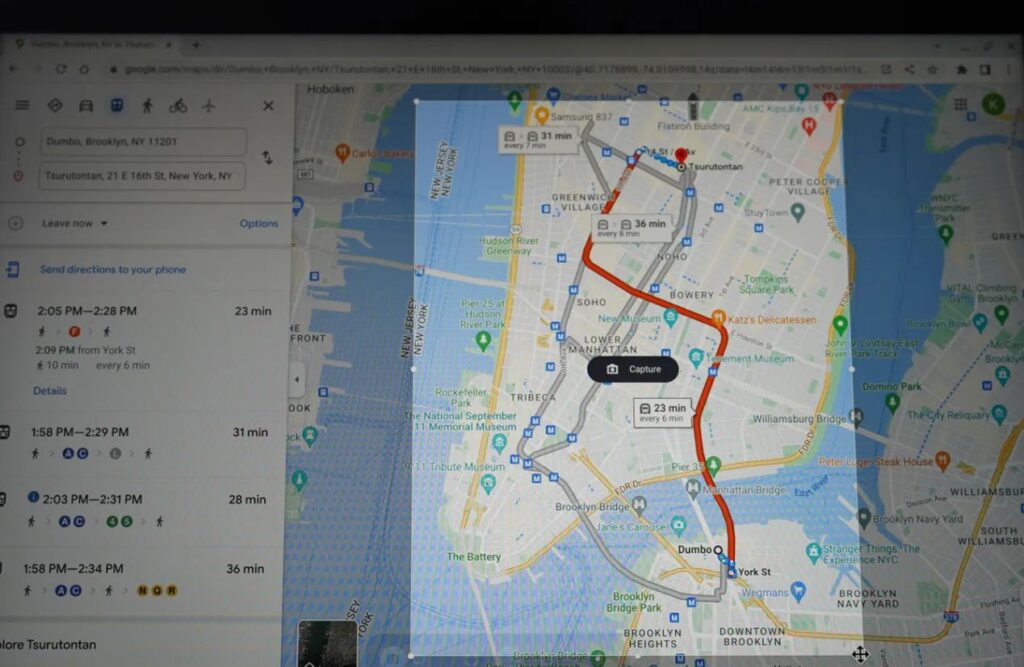
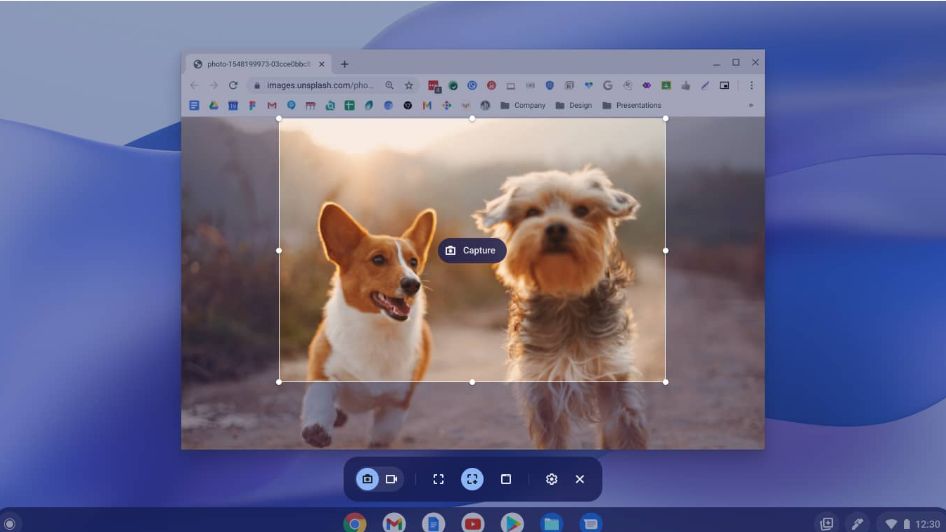
This will cause the screen to dim slightly and your cursor to turn into a crosshair.
Now you can use your mouse to drag and select the area you want to capture.
Once the desired area has been selected, click “Capture” from the Screen Capture tool.
As usual, you will find this screenshot in your Downloads folder.
Capture a window
Activate the Screen Capture tool again by pressing Shift + Ctrl + Show Windows Key.
Choose the “Window” icon from the tool.
You’ll see a screenshot toolbar in the bottom right corner of the screen.
Click on the window you want to capture. A screenshot will be automatically saved to your Downloads folder.

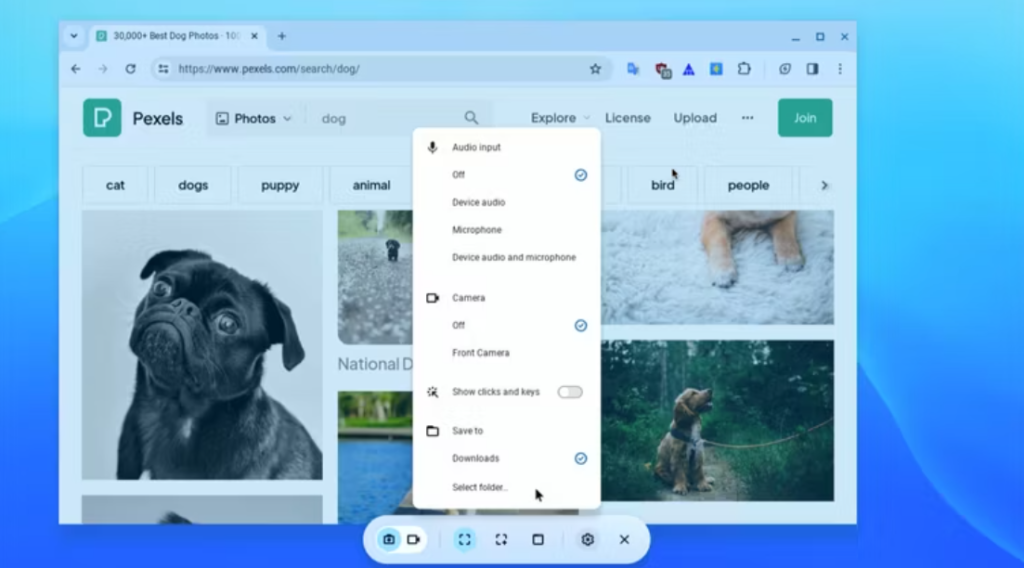
Take a screenshot on Chromebook (using the screen capture tool)
With Chromebook’s built-in Screen Capture tool, you can capture screen activity more easily.
To get started, follow these steps:
Access the Quick Settings panel by clicking on the time displayed on the Chromebook shelf (bottom right corner).
Locate the “Screen Capture” icon within the Quick Settings panel. You might have to expand the menu to find it.
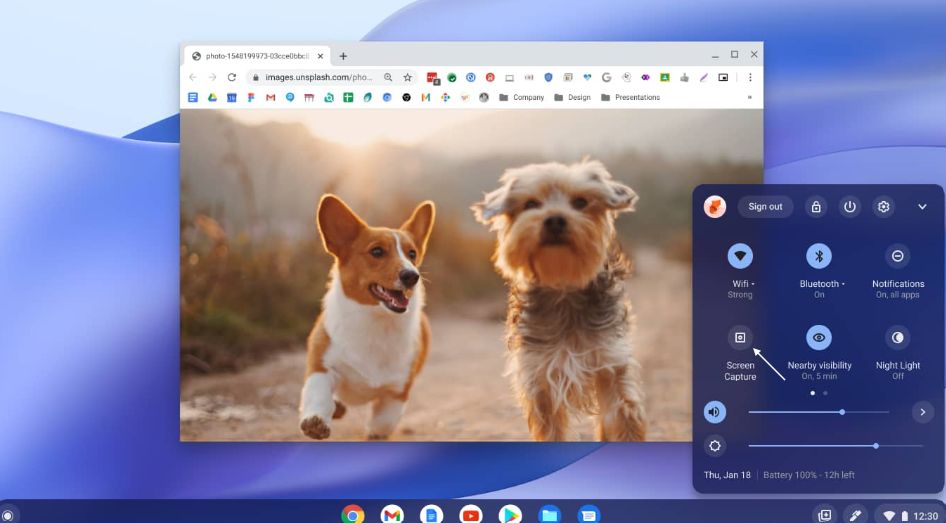
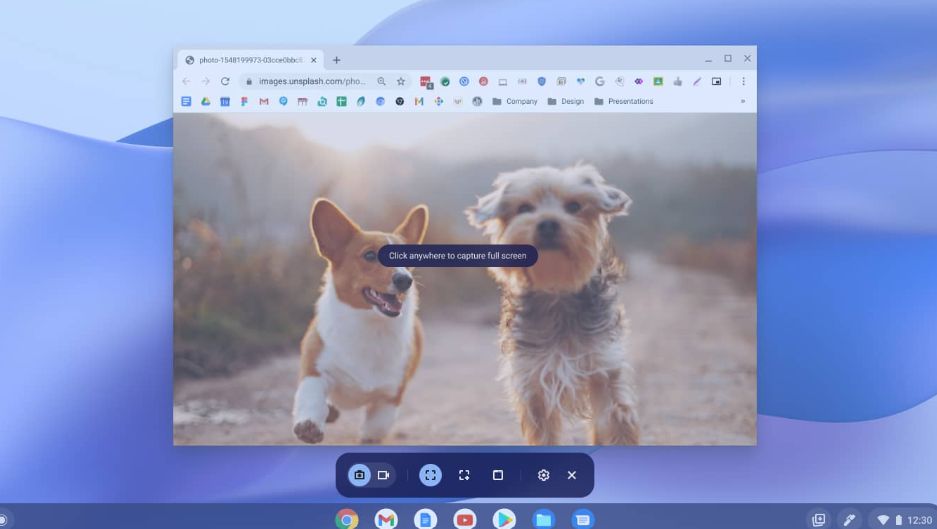
The “Screen Capture” icon will launch the Screen Capture tool, allowing you to capture the entire screen, a specific area, or a window.
Additionally, you can record a portion or the entire screen on your Chromebook.
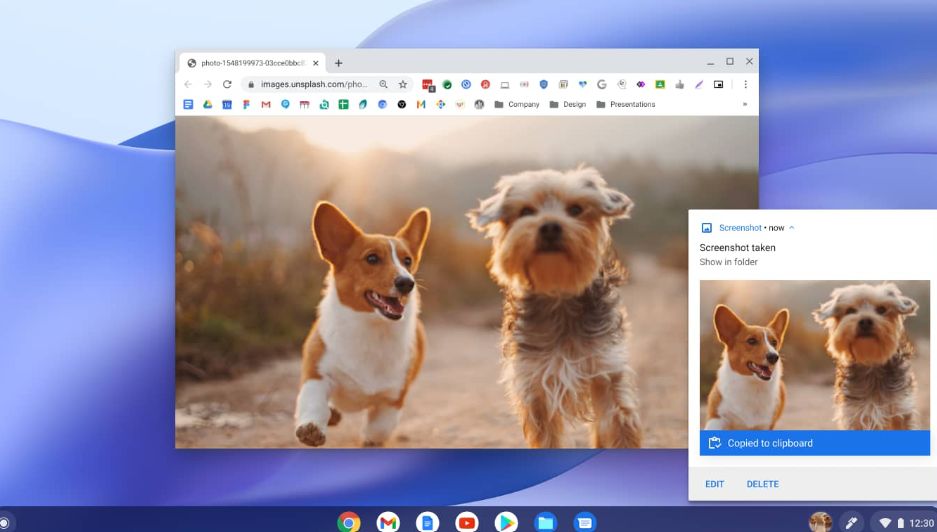
Once you’re done screenshotting. Tote will automatically copy the screenshot to your clipboard and display it on your shelf.
Capture screenshots on Chromebook (without Show Windows button or using an external keyboard)
For Chromebooks without a Show Windows button or external keyboards, press Ctrl + Shift + F5.
Capture screenshot on Chromebook (using dedicated screenshot key)
There is a dedicated screenshot key on some Chromebooks. To take a screenshot on a Chromebook, press the rectangle key (with a circle in it).
Find Your Chromebook Screenshots
What happens after you take a screenshot?
As soon as you take a screenshot, you can access it from the clipboard directly.
In the clipboard, you can view the last 5 items you copied.
Press Search+V to explore what’s available.
Screenshots can also be accessed from Tote. To open, Click on the Tote button on the shelf.
By default, you can access your screenshots by going to Files > Downloads Folder.
If you want to save your screenshots in a particular folder, you can do so as well.
To save screenshots to the desired folder Open Snipping Tool > Click on Settings (cog icon) > Select Folder.
Any screenshot you take from now on will automatically be saved to the selected folder, and you will only need to do that once, instead of each time you want to save a screenshot to a particular folder.
How to edit screenshots on Chromebook?
Chromebooks come with an image editor.
Open your screenshot file in the files app and make the basic edits.
Here’s how.
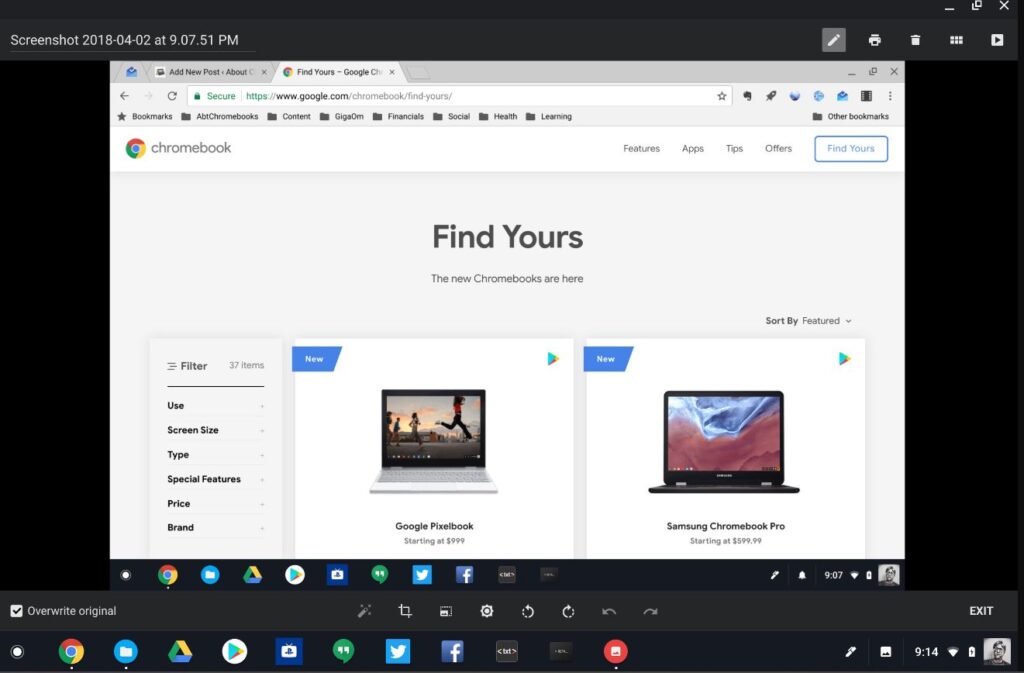
Double-click on the screenshot
Double-click a screenshot in your screenshot folder to edit it. Your screenshot will show up in an intuitive editing window.
Edit as desired
The editing options can be accessed at the bottom of the screen by clicking on the icons. As you hover your cursor over an icon, you will be shown what it is for, and you can double-click it to find out more.
Besides cropping and rotating, screenshots can also be adjusted in brightness, and contrast.
Save the edited screenshot
Click on the save button to save the edited screenshot to the Files App.
How to take a screenshot on Chromebook (using Stylus)
You can use your touchscreen Chromebook’s stylus to take notes and screenshots, draw, or work as a magnifier or laser pointer.
To take a full-screen screenshot on the stylus.
- Open your desktop, and tap the Stylus .
- Tap on Capture Screen.
To take a partial-screen screenshot.
- Open your desktop, and tap the Stylus .
- The Capture region option can be selected using Stylus.
- Touch the screen and hold your starting point with the stylus.
- Create a box by dragging your stylus to the point you wish to capture.
- Simply release Stylus to grab the screen portion you want.
Troubleshooting Common Chromebook Screenshot Issues
If you are having difficulty taking screenshots on your Chromebook, don’t worry! We have listed a few common problems and their solutions below:
Downloads folder missing screenshots
Check the storage space on your Chromebook. Transfer unnecessary files to an external drive or delete them to free up space. The lack of space may prevent screenshots from being saved if the disk is near its capacity.
Keyboard shortcuts not working
Make sure your Chromebook’s keyboard is functioning properly. If you are having trouble using the shortcuts, try connecting an external keyboard and testing them again.
On some Chromebooks, the top row of keys also contains a dedicated Screenshot key, which you can use to get the job done.
Screen capture tool does not appear
It may be due to a temporary software glitch. Restart your Chromebook.
Try updating the operating system on your Chromebook if the problem persists.
To check for updates, go to “Settings” > “About Chrome OS” > “Check for updates.”
Third-party screenshot tools for Chromebook
Google’s Chrome Web Store has tons of apps and extensions that extend Chrome OS’s built-in image tools.
Here are a few helpful picks:
Lightshot
User-Friendly: Lightshot excels at user-friendliness. Once installed, you can activate the tool with a keyboard shortcut, allowing you to select the area you want to capture. No complex settings or menus to navigate.
Lightweight: Lightshot is a lightweight screenshot tool that won’t bog down your system.
Basic Editing Features: While not a full-fledged image editor, Lightshot includes basic annotation tools such as text boxes, arrows, and a highlighter. This makes adding clarifications or markups to your screenshots as easy as 1-2-3.
Fast Uploads: Lightshot allows you to upload screenshots directly to the server for easy sharing. Manually saving and uploading the image is no longer necessary.
FireShot
Fireshot is a powerful screenshot utility that caters to both casual users and those who need more advanced capturing options.
Available as a browser extension and a standalone application.
Multiple capture modes: Fireshot goes beyond simply capturing the visible portion of your screen. You can capture the entire page, a specific region, or a scrolling screenshot to save lengthy content.
Annotation Tools: Fireshot features basic annotation tools like arrows, text boxes, and a highlighter, similar to Lightshot. You can highlight key points on your screenshots or add explanations.
Browser Extension: Fireshot also offers a seamless way to capture screenshots right from the web browser.
Movavi
Movavi is a free Chrome extension you can use to capture screenshots and PDFs online swiftly. The extension boasts a user-friendly interface with a number of useful features that can be accessed for free.
Ability to capture an entire page or specific areas: Movavi offers an intuitive solution to capture the entire webpage content or select a specific region.
Save in multiple formats: Save screenshots as JPEG, PNG, GIF, or PDF, depending on your needs.
Basic Editing Tools: Highlight key areas of the document with arrows, text boxes, and shapes.
Share Quickly: Share your captured screenshots and PDFs instantly via email, social media, or cloud storage (limited options in the free version).
For more advanced features like:
- Trimming
- Joining
- Effects & transitions
- Keyframe animation
- Timeline markers
- Fast processing of 4K videos
For $19.95 per month, you can upgrade to the pro version, which is an excellent deal considering the features.