
🧷 Key Takeaways
- Press the “Print Screen” (PrtSc) button to instantly capture the entire screen.
- Press “Alt + Print Screen”, to capture only the active window.
- Press the “Ctrl+Alt+Shift+R” to begin recording.
- Take advantage of GIMP’s editing power and Shutter’s advanced features for more control.
- Explore command-line options for power users with the “scrot” command.
Screenshots serve as a powerful tool for capturing on-screen information, documenting your work, and sharing visuals. While Windows users appreciate the ease of taking screenshots, what about Linux users?
Capturing screenshots on Linux is an entirely different process than capturing them on Windows or Mac. Mainly because Linux lacks a universal screenshot utility.
Despite this, Linux offers a variety of ways to take screenshots, catering to different preferences and needs. Fortunately, most Linux distributions include at least one screenshot-capturing tool, and if not, there are plenty to choose from.
This guide explores all of the possible screenshot methods on Linus, so you can take screenshots like a pro!
You’ll Learn:
- 5 Best Ways To Take A Screenshot On Linux
- How to take and edit screenshots on Linux using built-in tools.
- About third-party apps that enhance screenshot functionality on Linux.
Take Screenshots On Linux (Using Default Keyboard Shortcuts)
Use [Print] Key
Almost all keyboards have a dedicated “Print Screen” key (often abbreviated as “PrtSc” or “PrtScn”). You can use this key to take quick screenshots on Linux, regardless of the Linux flavor you’re running.
Typically, it is found between the Scroll Lock and Pause buttons on the top of the keyboard.
Here’s how to utilize it:
Capture Entire Screen: To take a screenshot of your entire screen, press the “Print Screen” key once. In some Linux distributions, the screenshot will be automatically saved (for example, to the Pictures folder) while in others, you will be asked where to save it.
Capture The Active Window: Want to capture only the active window? Press “Alt + Print Screen” together. By default, this screenshot will be saved to your Pictures folder.
Capture A Specific Area: Want more control? Press “Shift + Print Screen” to activate the selection tool. Drag the mouse to define the area you want to capture. This screenshot will be saved in the location you choose.
Use Screenshot Application
Linux distributions such as Ubuntu include a built-in screenshot application, which can be used in place of the Print Screen key for more flexibility and control.
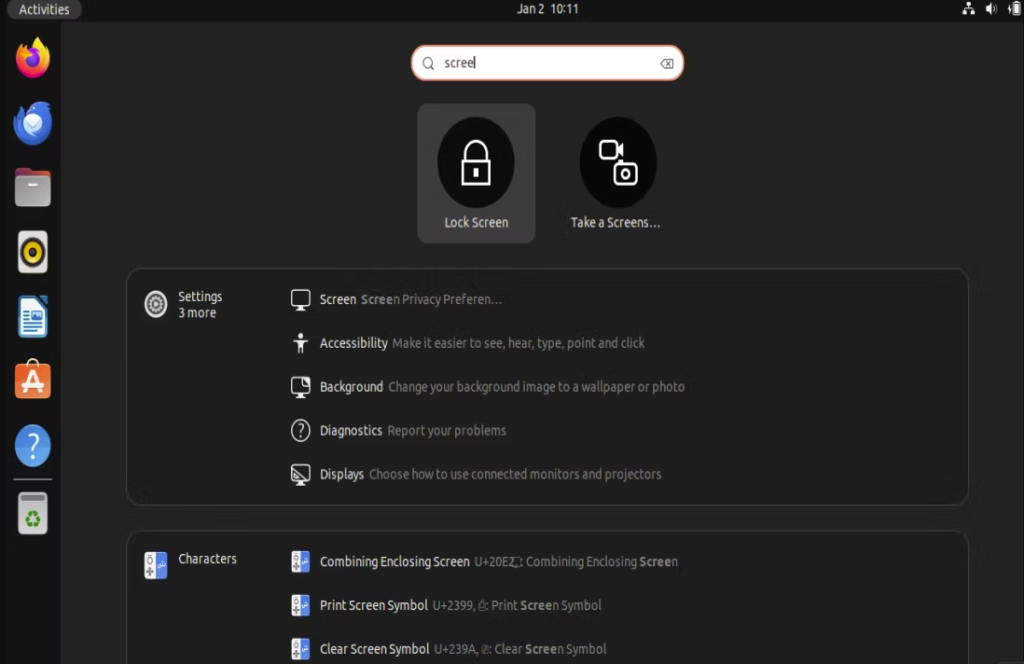
All you have to do is press the start button or click the launcher icon displayed on the screen to activate the Linux launcher.
Search for the word “Screenshot” and click on the first result.
Once the app is open, you’ll see options for snapping the entire screen, the current window, or a specific area. You can set a timed delay for it. 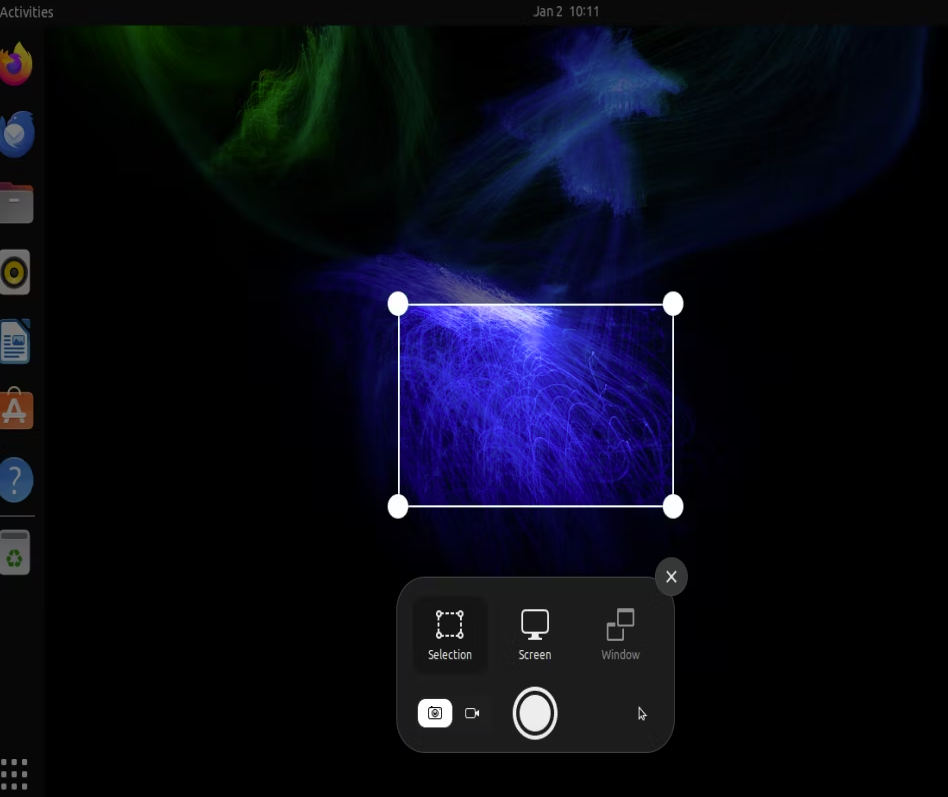
Pick an option, and once you’re satisfied, click on the “Take Screenshot” button (Green Button). 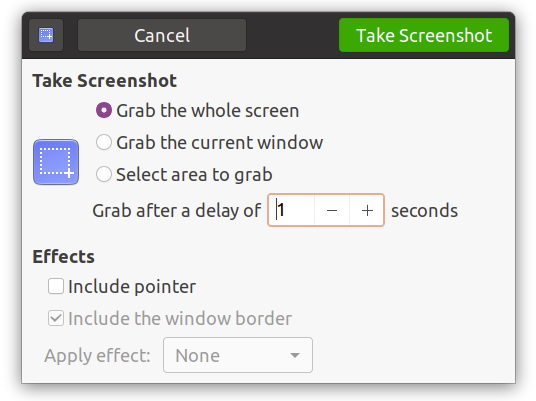
To take a screenshot on Ubuntu, click the circular button.
Following that, you will be prompted to save the screenshot.
Choose the folder in which you wish to save the screenshot and click “Save”.
Use Start Menu
While not all Linux distributions offer this method, some, particularly Ubuntu with GNOME Shell, feature built-in screenshot tools accessible from the Start Menu (Activities overview). You may find the tool titled “GNOME Screenshot” or something similar.
These tools usually offer selection options for the area or window you want to capture along with multiple saving options.
For specific details, please, refer to your distribution’s documentation.
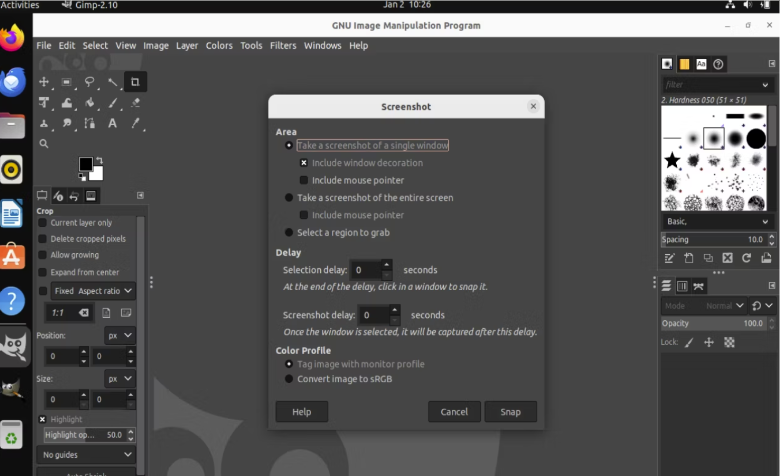
Use GIMP
For Linux distributions without a built-in screenshot utility, third-party apps such as GIMP are a good option for several reasons.
The open-source GIMP image editor comes with screenshot capabilities and can be downloaded manually from the web or via the terminal.
Here’s how to leverage it:
Start by installing GIMP using the terminal. To open the terminal, press “Ctrl+Alt+T”.
Now type in the command ‘sudo apt install gimp’. You will be prompted to enter your password and to confirm the installation. Use Y to confirm.
Once GIMP is installed, launch the app,
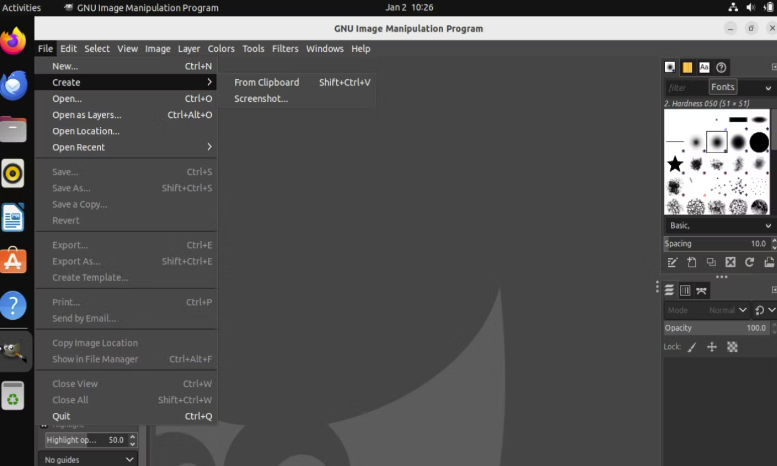
Click on the “File” from the top menu and then hover over the “Create” option. On hover, you’ll be presented with two options.
- From clipboard
- Screenshot
Select “Screenshot”. With this option, you can capture the entire screen or choose specific windows or areas to capture.
Click Snap when you’re ready to capture the screenshot.
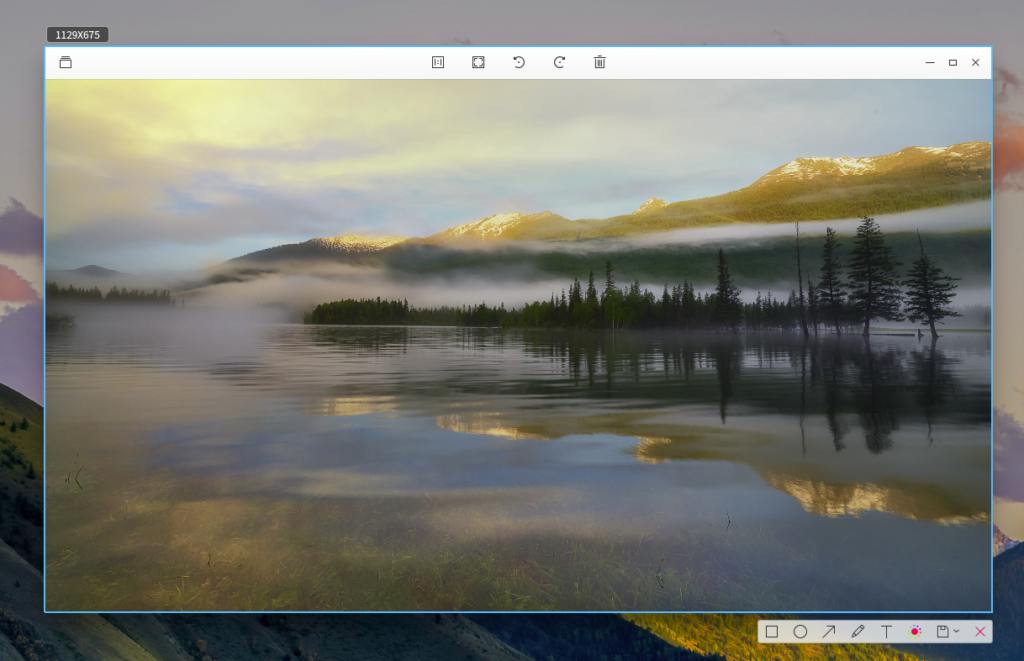
Captured screenshot will be opened in GIMP.
Click File, Save As, and choose the location where you want to save the file.
(Optional) After capturing the screenshot, use GIMP’s editing tools to enhance the image even further by modifying annotations, resizing, and other aspects.
Use Terminal
Power users comfortable with the command line can take screenshots in Linux using the terminal. You can use Deepin Scrot, or Shutter, both of which are supported by the majority of Linux distributions.
Shutter
Shutter is another popular method for taking screenshots in Linux offering a broader set of features compared to basic screenshot methods.
The program has a user-friendly interface for various capture options: entire screen, specific window, selection area, and even capture with a delay.
It can be installed using most distribution package managers. All you have to do is search for “Shutter” and install it as instructed on the project’s official homepage.
If it’s not pre-installed on your system, you may have to install it (using the terminal) manually.

Install Shutter
Here’s how you can install it from terminal on “Debian-based” distributions:
Type “sudo add-apt-repository ppa:shutter/ppa” and hit enter.
Now update your repositories by typing “sudo apt-get update” and then install Shutter by typing “sudo apt-get install shutter”.
Capture Screenshot
Once installed, you’ll see the 3 options on top of the Shutter window, which include:
- Selection
- Desktop
- Window
For a screenshot, click on your preferred choice.
Now depending on the type of screenshot you chose, you’ll get a response.
- On clicking “Selection”, your screen will dim and you will be able to click and drag to create a selection box.
- On clicking “Desktop” a screenshot will be taken automatically.
- On clicking “Window” you’ll be able to click the window you plan to capture.
Note: A screenshot will be automatically saved to your Pictures folder.
Edit Screenshot
Shutter will display a preview after you take a screenshot with an edit option positioned in the upper right corner alongside an export option.
Open the Shutter editor by clicking on “Edit“.
Using the editor, you can highlight or annotate things on the screenshot.
Once you’re done, click “Save“.
Deepin Scrot
Deepin Screenshot is a fully functional lightweight tool used in Linux Deepin OS, with options for adding text, arrows, lines, and drawings.
Install Deepin Scrot
Here’s how you can install it from terminal on “Debian-based” distributions:
Type “sudo apt-get install scrot” and hit enter.
Once it’s installed, launch it by using the following command:
scrot [options] [filename]. Parameters [] are optional.
Take a screenshot by following the instructions below:
Capture Screenshot
Capture the entire screen: To capture your entire screen and save it as “screenshot.png,” simply type the following command and press Enter “scrot screenshot.png”.
Capture a specific area: Need a more precise capture?
Use the -s option followed by coordinates defining the rectangle you want to capture.
Here’s an example capturing an area starting from the top-left corner (coordinates 100,50) with a width of 400 pixels and a height of 300 pixels, saving it as “area_screenshot.png”:
Type “scrot -s 100×50:400×300 area_screenshot.png”.