
🧷 Key Takeaways
- Press the “Print Screen” button to capture the entire screen.
- Press Windows key + Print Screen Button to automatically save screenshots.
- Press Alt + Print Screen to capture the active window.
- Snip & Skip on Windows 10 to capture parts of the screen.
- Press Power + Volume Up to take a screenshot in Windows 10 on a Microsoft Surface device.
- Use the snipping tool in Windows 11 to take delayed screenshots.
- Press “Windows key + G” to take screenshots and record videos using the Gamebar.
- Best third-party apps for Windows.
Taking a screenshot on Windows is an essential skill everyone must learn if they want to save or share visual content across multiple programs, websites, or videos.
Fortunately, Windows makes it easy to take screenshots on the go, with a dedicated key for it on the keyboard. PrtSc, PrtScn, or Print Screen depending on your keyboard.
This comprehensive guide will walk you through precisely how to screenshot on a Windows PC, irrespective of the edition or keyboard configuration.
You’ll Learn
- 6 easy ways to take high-quality screenshots on Windows
- How to capture a single screen, the entire scrolling webpage, or simply a portion
- The best third-party apps for taking screenshots with advanced features
- Differences between Windows 10 and Windows 11 regarding screenshots
Let’s get started.
How To Take A Screenshot On Windows PC
While there are several ways to take a screenshot on Windows, irrespective of the OS version, we recommend using built-in options, that offer powerful editing capabilities.
Print Screen Button (Capture Entire Screen)
One of the easiest and long-time classic methods of capturing a screenshot of the entire screen is to use the print screen button abbreviated as “PrtSc” or “PrtScn” (depending on the keyboard).

Incredibly useful for capturing screenshots of apps that change appearance with a certain key combination.
If you are using a wired keyboard, look for the print screen button on the top row of the keyboard, next to the F12 key.
If you are using a laptop, look for the print screen button on the top line or the bottom line of the keyboard.
- Press the key “PrtSc” button on your keyboard. The screenshot will be saved to your clipboard which you can also save to your screenshots folder.
- You can then open any program that allows you to insert images, such as Paint, Microsoft Word, or PowerPoint, and paste the screenshot by pressing Ctrl-V.
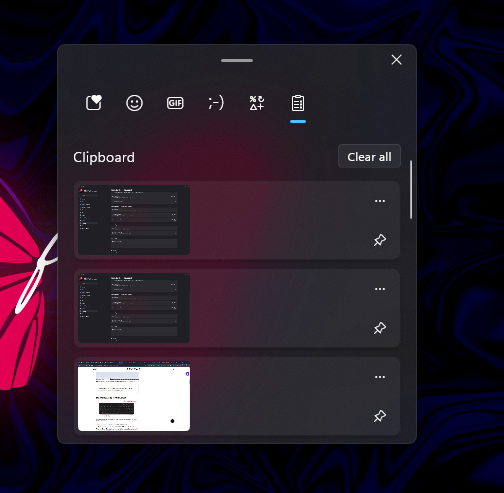
Press the Windows key + V to open the clipboard and view your screenshots.
Note: This method captures everything visible on your screen and you won’t see any indication of a successful screenshot.
Windows Key + Print Screen Button (Automatically Save Screenshots)
- Press the Windows key + PrtScn to capture the screenshot and automatically save it to the Screenshots folder.
With this method, the screen will dim momentarily, indicating you’ve taken a screenshot, which is saved as a PNG file.
To view captured screenshots:
Press the Windows key + E to open File Explorer.
For Windows 10 and earlier versions, click pictures in the left side panel.
For Windows 11, click Gallery at the top of the left side panel.
Alt + Print Screen (Capture Active Window on Multiple Screens)
This will snap your currently active window and copy the screenshot to the clipboard. You’ll need to open the shot in an image editor to save it.
- Press Alt + PrtScn to quickly capture only the active window you are working in.
- The captured screenshot will be copied to the clipboard.
- To save, use Ctrl + V to paste it into the applications we talked about earlier.
Snip & Sketch In Windows 10 (Capture Parts of Screen)
Windows 10 “snip and sketch” feature is one of the best ways to take a screenshot on Windows. Especially if you’re looking to capture parts of your screen – customize, annotate, or even share.
- Use the toolbar search or press Window Key + Shift + S, to activate snip & sketch.

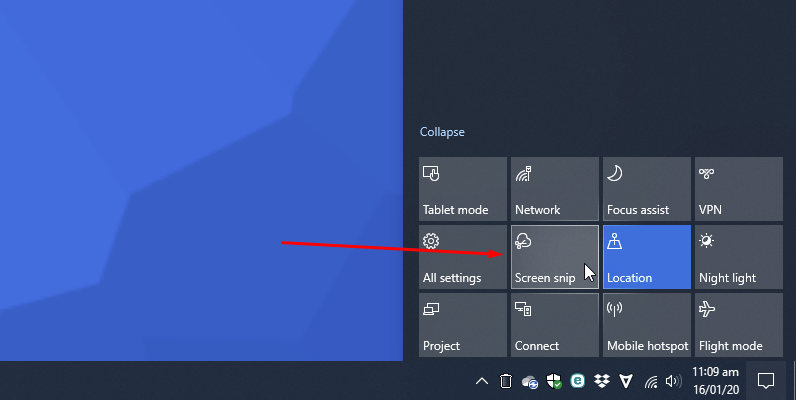
- Snip & Sketch can also be accessed via the Action Center’s Screen Snip button.

- Click on the “New button” to start taking screenshots.
- Drag and move the crosshair over the area you wish to capture.
- Leave the mouse click and your screen will flash, indicating a successful screenshot.
The default snip type is rectangular, but you can also snip free-form, full-screen, and window objects.
Note: The Snipping Tool does not save screenshots automatically — you have to save them manually before you exit — however, it does copy your screenshots to the clipboard automatically.
Power + Volume Up (Screenshot In Windows 10 On Microsoft Surface Device)
Press the Power + Volume Up button at the same time to take a screenshot on your Microsoft Surface device powered by Windows 10.
Press the Windows Logo + Volume Down button to take a screenshot on a Surface 3 or older.
Again, the screen will go dim, saving your screenshot to Pictures > Screenshots.
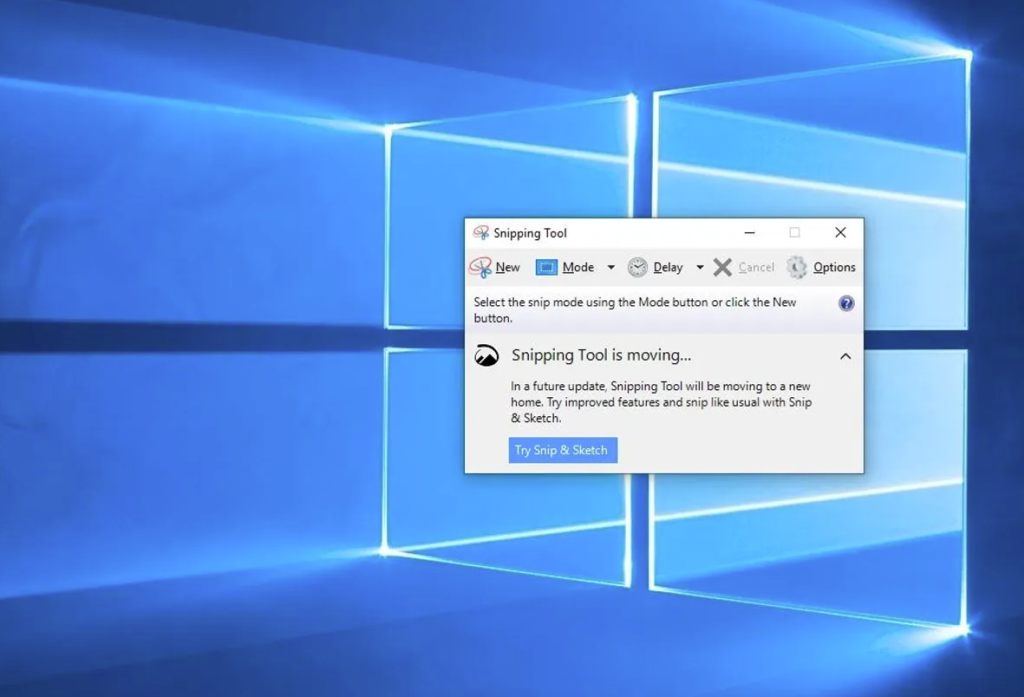
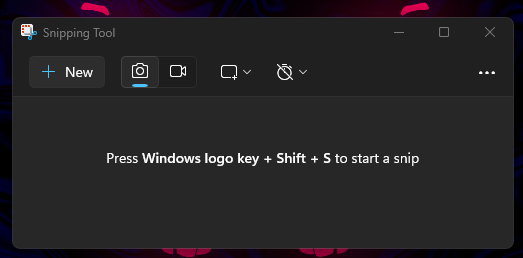
Snipping Tool In Windows 11
Taking custom screenshots is now easier than ever with Windows 11’s new snipping tool, which gives you more control over the capture area.
- Search for the snipping tool in the Windows search bar or Press the Windows Key + Shift + S to activate the snipping tool.
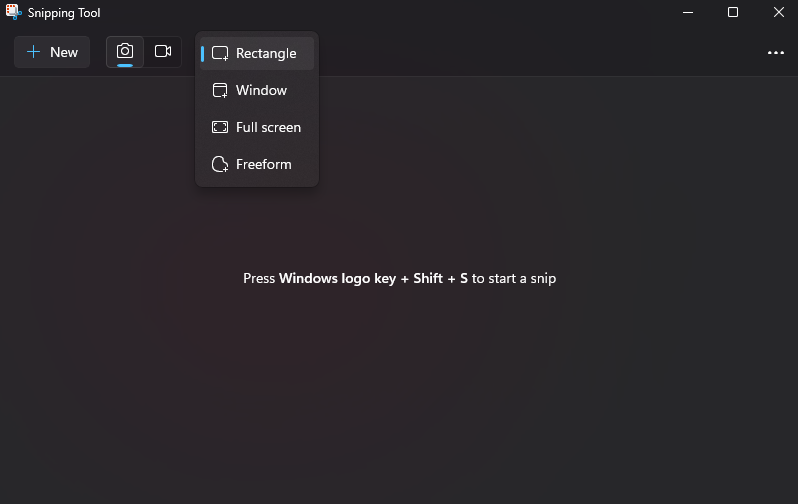
- Upon pressing the keys, your screen will flash and the Snipping Tool menu will appear usually at the top of the screen with multiple options.
- Select the capture mode from the options available: Rectangular (default), Freeform (draw any shape), Window (captures the active window), or Fullscreen.
- Click and drag your mouse around the area you wish to capture based on the mode.
- Following that, you can make basic edits such as cropping or adding notes before saving the screenshot.
- Once you take the screenshot, it will be saved to your clipboard. View it by pasting it on other programs. You can save a screenshot to your desktop by clicking the Snipping Tool preview that appears at the bottom of the screen.
Take Delayed Screenshots In Windows 11 (Using Snipping Tool)
You may want to take a screenshot in a couple of seconds for whatever reason.
Pressing the Print Screen key or another key combination before the OS snaps a picture could cause the pulldown menu to disappear before you snap a screenshot.
In that case, it makes sense to schedule a screenshot for later so you can capture it when you are ready.
You can launch either Snipping Tool for Windows 11 or Snip & Sketch for Windows 10 not with keyboard shortcuts, but by searching for it or selecting it from the Start menu.
Next, set a delay time using the Delay menu on Windows 11 or the New menu on Windows 10.
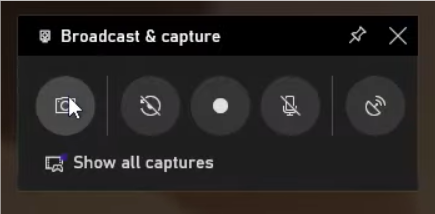
Windows Key + G (Take Screenshots & Record Videos Using Gamebar)
If you don’t have the PrtScn key on your keyboard, Microsoft has another keyboard shortcut you might find useful named “Game bar”.
Game Bar appears as an overlay that can be used in the middle of games or Windows apps to take screenshots and record videos.
Here’s how you can open the Game bar and use it:
- Press the Windows key + G to open the game bar with a webcam-like icon.
- Click on the capture button, present in the overlay menu on the left, resembling a camera.
- Click the camera icon to take a screenshot.

- To record a video, press the record button, and click the microphone icon if you want to include audio.
- Go to Settings > Gaming > Game bar and set your own keyboard shortcut for taking screenshots.
In File Explorer, go to Videos > Captures to view screenshots or videos saved as PNG or MP4 files captured using the Game Bar.
You can also access them through the Game Bar’s Gallery, under the screenshot and recording buttons in the Capture menu by clicking Show my captures > See my captures.
Third-Party Screenshot Apps For Windows
Best Free Screenshot Apps For Windows
Lightshot
Lightshot is an incredible screenshot tool with a super intuitive interface and quick sharing features. You can quickly take screenshots of a particular area or the entire screen.
A key feature of Lightshot is the ability to customize hotkeys for taking screenshots, which can simplify the process and improve efficiency.
Greenshot
Greenshot is another terrific free screenshot tool for Windows with various screenshot modes, annotation utilities, and export options.
You can even configure hotkeys, output formats, and other settings to suit your needs.
ShareX
The free and feature-rich screenshot app “Sharex” is another excellent choice Windows users can take advantage of. This app lets you capture and record screens, edit images, and share files on the go.
A key strength of ShareX is its high level of customization. Hotkeys, file naming conventions, output formats, and almost every other aspect of the tool can be tailored to suit your needs.
For new users, ShareX’s extensive customization options can be overwhelming. Once you are familiar with the interface and settings, you can fully utilize its features.
Best Paid Screenshot App For Windows
Snagit
Snagit is a versatile screenshot tool that goes beyond basic screenshotting. With Snagit, you can create animated GIFs, screenshot entire pages, record screen activity, edit images, and more.
Comes with an intuitive interface that’s easy to navigate, even for users with minimal technical expertise. The premium version costs $50, which is a good deal, although you can try it for free for 30 days. Still, any picture you capture will be watermarked.