
🧷 Key Takeaways
- Take screenshots with a controller, voice commands, or the Xbox app.
- Enable 4K HDR for high-quality captures (compatible consoles only).
- Save and access screenshots on a PC using the Xbox app.
- Share screenshots directly or upload them to OneDrive.
- Consider third-party apps for advanced recording and editing features.
It is not uncommon for one to be left stunned by the breathtaking visuals rendered by games played on Xbox.
Following that, it makes absolute sense why someone would want to capture the incredible vistas of video game series such as Battlefield 3.
Whether you’re marveling at a stunning view in-game or reveling in a major lopsided victory in online multiplayer, capturing moments in your gaming journey is priceless for 3 reasons.
- To share your achievements online.
- To keep track of your progress.
- Or simply reliving thrilling experiences.
You can do this by taking screenshots on Xbox.
Luckily taking a screenshot on an Xbox is just as easy as on a laptop or phone.
Note: You can only take screenshots during gameplay — there is no way to screenshot the main menu or home screen. Moreover, you’ll need an Xbox Live Gold or Game Pass Ultimate account to save and share screenshots from Xbox.
This comprehensive guide will walk you through the various methods for taking screenshots on your Xbox console, from traditional controller commands to advanced techniques like voice commands and PC capture.
You’ll learn:
- To take a screenshot on Xbox One
- To take a screenshot of your Xbox on PC via the Xbox app
- To access Xbox One screenshots From PC
- To take a screenshot on Xbox using voice commands
- To enable 4K HDR screenshots
- To backup your Xbox screenshots using one drive
Let’s get started.
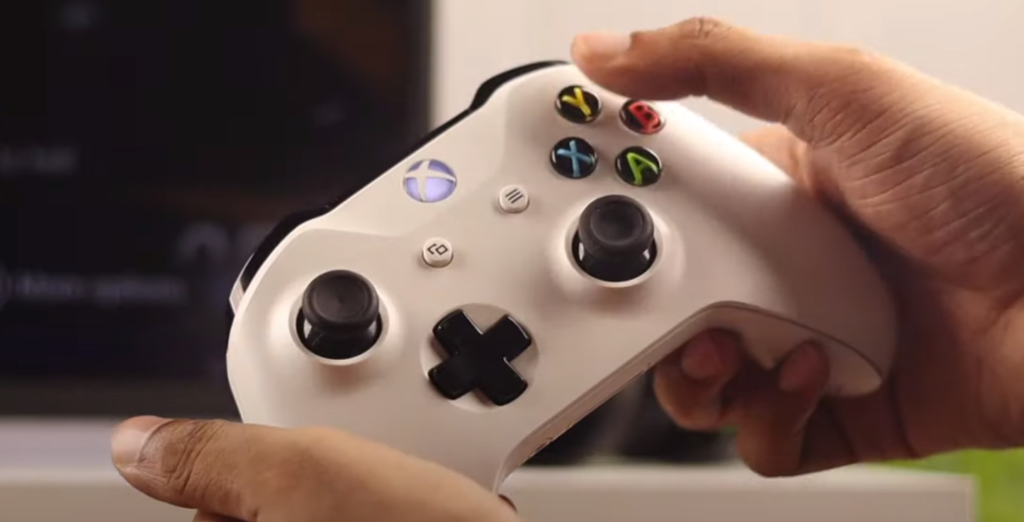
How To Take A Screenshot On Xbox One (Using Controller)
Xbox One features integrated screen capture and video recording capabilities, which you can use to capture and share game footage online.
- Press the “Xbox button” (big, circular X logo) in the center of your controller to open the guide menu.
- Once the guide appears, press the “Y” button to instantly take a screenshot.
A dialog box will appear on your screen confirming the successful storage of the captured screenshot.
Screenshot Anywhere on Xbox (Using Share Button)
If you have a console with a dedicated share button, you can snap a screenshot anywhere you want without opening the guide. All you have to do is press the share button.

Record Gameplay On Xbox (for up to 2 minutes)
- Launch your Xbox game, as usual.
- Press the Xbox button and a sidebar (guide) will appear on your screen.
- Once there, you will be given the option to either take a screenshot or record the last 30 seconds of the gameplay.
- Press “X”, to record the last 30 seconds.
- Press the “View” button to record a longer clip of up to the last 2 minutes.
How To Take A Screenshot On Xbox One (Using Voice Commands)
Xbox One originally had a Kinect motion sensor, which was later replaced by a Cortana sensor.
Fortunately, they both let you take screenshots using voice commands.
Using Kinect Sensor
If you’re using a Kinect sensor simply say, “Xbox, take a screenshot”.
After taking the screenshot, say ‘Xbox open that’ for the screenshot to appear on your screen, or press and hold the Xbox button on the controller.
Using Cortana Sensor
Instead, if you’re using a Cortana sensor instead of the Kinect’s legacy commands, say, “Hey Cortana, take a screenshot!”
Using Amazon Alexa
If you are using Amazon Alexa, say, “Alexa, Take a screenshot”.
Note: You must activate voice commands for them to work.
How to activate voice commands in Xbox?
To activate voice commands in Xbox, follow the steps below:
- Go to the Xbox One’s Settings menu.
- Select All Settings from the menu.
- Click on System and activate the AI Companion feature.
If you are taking screenshots or recording videos via voice commands in a noisy environment, make sure you state the command clearly enough for the AI to understand what you are saying.
How To Enable 4K HDR Screenshots & Video Clips On Xbox One
To be able to capture a 4K HDR screenshot and video clip on Xbox One, ensure that your console settings are optimized for HDR content and adjust your capture settings accordingly.
Here’s how you do it step by step.
- Check hardware compatibility: Make sure your Xbox One model supports HDR. Check your console’s specifications to see if it does.
- Enable HDR on your TV: If you haven’t already, enable HDR in your TV’s settings. You can do this by navigating to the settings of the TV and turning on HDR or UHD Color.
- Now Enable 4K Settings On Xbox:
- Press the Xbox button.
- Navigate to System > Settings.
- Click on preferences > Broadcast & Capture > Game Clip resolution.
- Now select a 4K option from the list.
From now on, you will be taking screenshots in 4K.
Note: If you plan to share these images on social media, you may have to resize them on your device due to the large size of 4K images.
How To Access Xbox One Screenshots and Videos From PC
Although you can share your screenshots straight from Xbox One, you might find it more convenient to archive them on a PC.
One recommended method is to use the Xbox app.
Access Xbox One Screenshot And Videos On Computer Via Xbox App
The Xbox App makes it easy to catch Xbox One captures on a PC.
Here’s how you can use the Xbox app to download and save Xbox One captures to your Windows PC.
- Download and install the Xbox app on your PC.
- Launch the Xbox app on your PC.
- Now, log in to your Microsoft account associated with your Xbox.
- Select the “Game DVR” option.
- Go to the DVR menu and select “Xbox Live”.
- Select the screenshots and videos you’d like to save on your PC.
- Click download once you’re done.
Now you can easily access images and videos saved on your computer from the Xbox app.
Follow the steps below to access them:
- Launch the Xbox app and go to the DVR menu.
- Select the “On This PC” option.
- You can now select the screenshots or videos you want to view.
- Click “Open Folder”.
Your computer will then open the media folder containing all the captured images and videos. Share them or even upload them – whatever suits you.
The best part is – you can now organize and save all your gaming memories in one place.
How To Share A Screenshot On Xbox One (Using One Drive)
Screenshot sharing on Xbox One is pretty easy with One Drive. The only prerequisite to using this option is setting up OneDrive first.
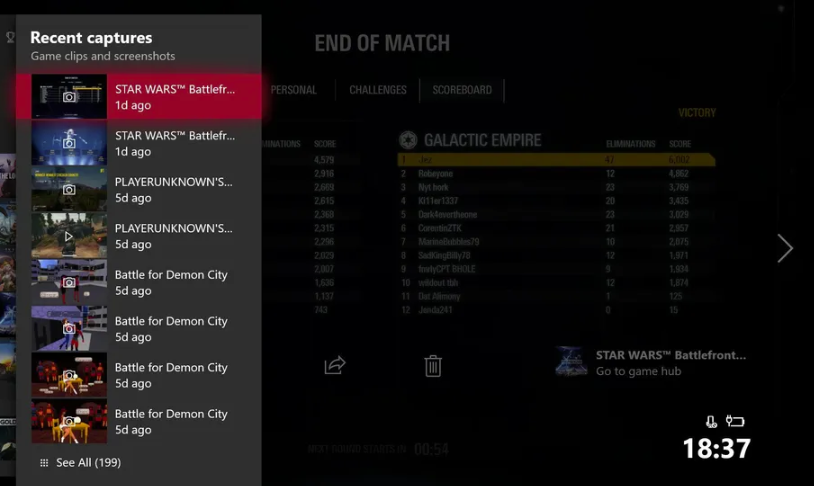
Once you are ready to share your captures on Xbox One follow the steps below:
- Press the Xbox button on your controller.
- Navigate to the “Broadcast and Capture” tab.
- Select “Recent Captures”.

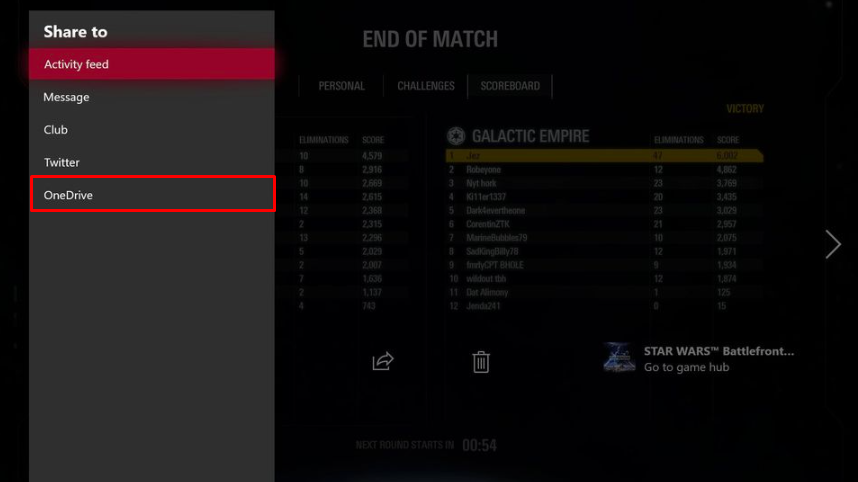
- Select the images or videos you want to share and you’ll be presented with options like Activity Feed, Twitter, OneDrive, and private messages.

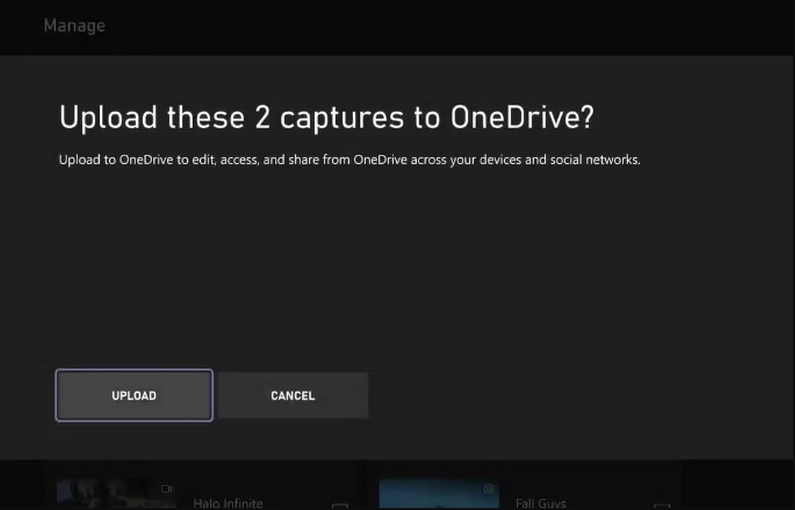
- Select OneDrive as the source and upload the video or image to the OneDrive account linked to your Gamertag account.

How To Delete A Screenshot From Xbox One?
Xbox Live offers to save your screenshots on their server in case you need them later or switch consoles. This is something you will notice when you are about to delete a screenshot.
Follow the steps below to delete a screenshot:
- Press the Xbox button on your controller.
- Long press the view button on the controller. This will open the capture options.
- Select the screenshot you want to delete and then select delete.
- Three options will appear on your screen, delete from console, from Xbox Live, or both.
- Choose what works best for you.
Best Apps To Take Screenshots And Record Videos On Xbox
EaseUS RecExperts (Free)
EaseUS RecExperts stands out as an ideal option for regular gamers seeking a hassle-free way to capture their gameplay with good quality.
RecExperts supports recording in 4K and 60 FPS resolutions, ensuring smooth and sharp gameplay video.
The dedicated game mode, high-resolution recording options, and real-time editing features add significant value to this product.
However, the free version’s limitations might push power users to look for alternatives such as OBS Studio.
DemoCreator (Free)
Second on our list is DemoCreator – a powerful tool for recording high-quality gameplay videos and screenshots. The best part is – this program automatically detects running games on your PC or Mac and provides automatic settings for recording areas and frame rates.
Democreator allows you to use your webcam in gameplay videos so you can clearly explain your expertise. It even includes a built-in video editor for creating polished videos.
While the interface is user-friendly, it might take longer to get used to the built-in video editor than a simpler screen recording program.
HitPaw Screen Recorder (Paid)
With Xbox, screenshots, and recordings of the last 30 seconds – 2 minutes of gameplay are possible. Still, if you’re looking for a more advanced yet intuitive option to take screenshots and record screens in HD, then HitPaw Screen Recorder comes highly recommended.
HitPaw is an easy-to-use tool that even newbies can use to capture screenshots and gameplay videos. With its easy-to-use interface, hardware acceleration, and basic editing tools, it is a well-rounded option for most users.
For those who dislike subscription-based models, a once-off payment might be an appealing option. The free version’s limited features might nudge some users towards free alternatives.